

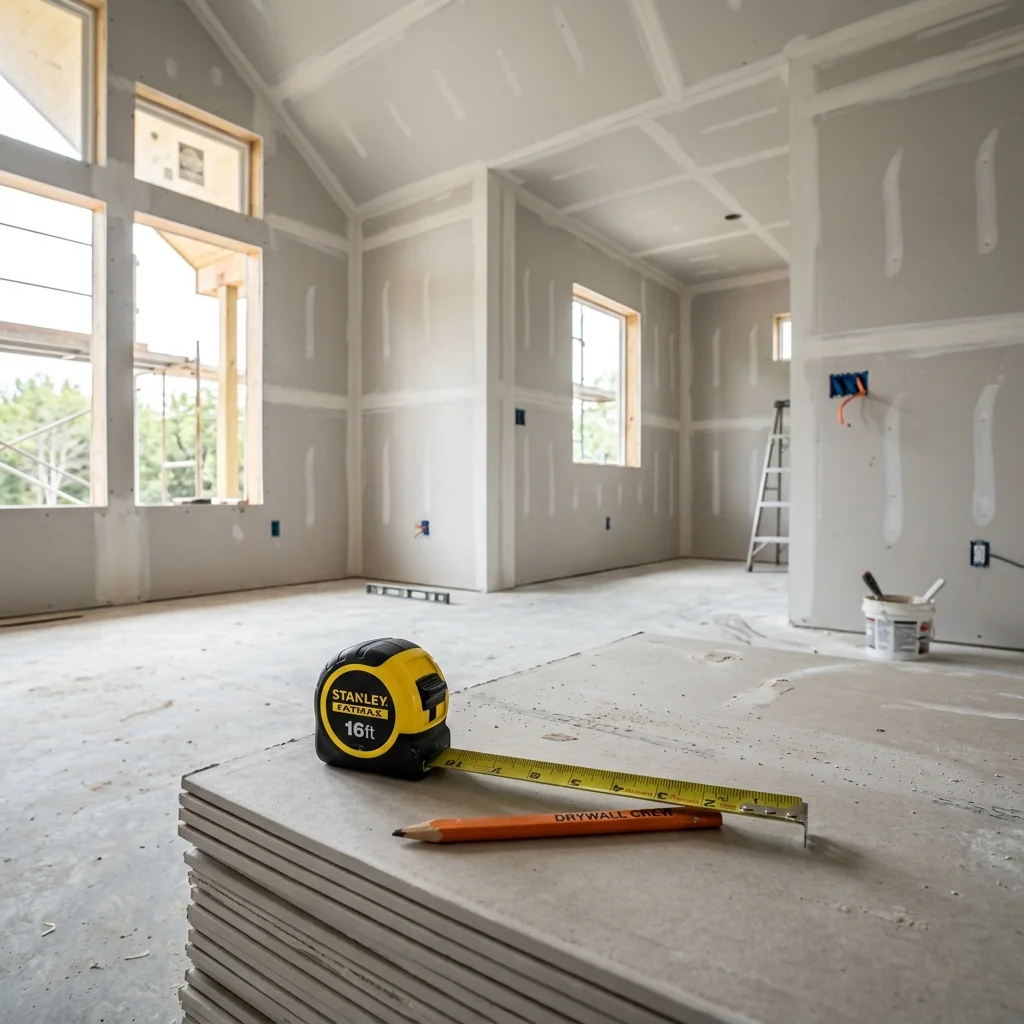
How to Estimate Drywall Sheets, Joint Compound, and Tape for Any Room
A complete guide to estimating drywall sheets, joint compound, tape, screws, and finishing materials for walls and ceilings. Learn the formulas, waste factors, and layout tips professionals use.
Finishing a basement, building a new partition wall, or repairing a water-damaged ceiling all start with the same question: how much drywall do I actually need? Most homeowners count sheets in their head, subtract the door, and hope for the best. That approach almost always leads to a mid-project lumberyard run for more mud, tape, or boards.
Drywall estimation is more than a simple area calculation. You need to account for sheet size, board thickness, ceiling height, seam layout, waste from cutouts, and the three separate finishing products that turn raw gypsum board into a paint-ready surface. This guide walks you through the full process — from measuring square footage to building a complete drywall materials list — so you can order once and finish the job without surprises.
If you want the numbers instantly, our free Drywall & Sheetrock Calculator handles sheets, mud, tape, and screws in one step. Read on to understand the math behind it.
Step 1: Measure the Total Square Footage
Every drywall estimate starts with surface area. You need the square footage of every wall and every ceiling you plan to cover. For a standard rectangular room, the math is straightforward:
- Each wall: Length × Height
- Ceiling: Length × Width
- Total area: Sum of all walls + ceiling
For example, a 12-foot by 14-foot room with 8-foot ceilings has four walls totaling 416 square feet (two walls at 12×8 = 96 sq ft each, plus two at 14×8 = 112 sq ft each) and a ceiling of 168 square feet. That gives you 584 total square feet of drywall surface.
Use our Wall Square Footage Calculator when rooms have multiple walls, odd angles, or openings you want to track separately. For rooms with vaulted or sloped ceilings, the Room Volume Calculator helps you work out ceiling heights at different points along the slope.
Pro Tip: Do Not Subtract Doors and Windows
Professional estimators calculate based on gross wall area, not net area. The scraps from cutting around doors and windows become filler pieces elsewhere. Subtracting openings saves money on paper but causes shortages on the job site. Always add a waste factor on top of gross area instead.
Step 2: Choose the Right Drywall Sheet Size and Thickness
Drywall comes in standard 4-foot widths with lengths of 8, 10, or 12 feet. The sheet you choose directly affects how many boards you buy and how many seams you must tape and mud.
| Sheet Size | Area per Sheet | Best For |
|---|---|---|
| 4' × 8' | 32 sq ft | Standard 8-foot ceilings; easy to carry and install solo |
| 4' × 10' | 40 sq ft | 9-foot ceilings; eliminates a horizontal seam at the 8-foot mark |
| 4' × 12' | 48 sq ft | Large rooms and 10-foot+ ceilings; fewest seams to finish |
Thickness matters too. 1/2-inch drywall is the standard for most interior walls and ceilings in residential construction. Use 5/8-inch Type X fire-rated board where building codes require it — typically on garage ceilings, shared walls between units, and certain stairwells. Moisture-resistant greenboard (also 1/2 inch) belongs in bathrooms, laundry rooms, and other high-humidity spaces.
Step 3: Calculate How Many Drywall Sheets You Need
Once you know your total square footage and chosen sheet size, the core drywall sheet calculator formula is simple:
Drywall Sheet Count
Where Atotal is total surface area in sq ft, Asheet is the area of one board (32, 40, or 48 sq ft), and w is the waste factor (typically 0.10 for a 10% allowance).
Example: 584 sq ft ÷ 32 sq ft per 4×8 sheet = 18.25 sheets. With 10% waste: 18.25 × 1.10 = 21 sheets (always round up).
A 10% waste factor covers cutouts around windows and doors, broken corners during delivery, and odd-shaped walls. For rooms with many openings or complex layouts, bump the waste factor to 15%. Read our Construction Waste Factor Guide for a deeper look at when to adjust this number.
Step 4: Plan Your Sheet Layout to Minimize Seams

How you hang the boards affects both material count and finishing labor. The goal is to reduce the number of seams that need taping and mudding, because every seam consumes joint compound and tape.
- Hang horizontally on walls. Professional crews run sheets lengthwise around the room. On an 8-foot wall, a single 4×8 sheet covers the full height with no horizontal seam.
- Stagger vertical seams. Never line up seams on adjacent rows. Offset each course by at least 4 feet so joints do not form a continuous line from floor to ceiling.
- Use longer sheets on tall walls. If your ceiling is 9 or 10 feet, 4×10 or 4×12 sheets hung horizontally eliminate the mid-wall seam that shorter boards would create.
- Start from the ceiling down on walls. The tightest fit belongs at the top where the board meets the ceiling. The bottom edge gets covered by baseboard trim, so a small gap there is acceptable.
Good layout planning is what separates a quick finish from a week of sanding. A thoughtful layout can cut your finishing time by 20% or more, even when the sheet count stays the same.
Step 5: Estimate Joint Compound (Drywall Mud)

Joint compound — commonly called mud — is the product that hides seams, covers screw heads, and creates a smooth surface for paint. This is the item most DIYers underestimate. A standard Level 4 finish (three coats over tape and screws, then sanded) uses far more mud than most people expect.
The professional rule of thumb for a joint compound calculator estimate:
Joint Compound Estimate
This yields gallons of all-purpose joint compound for a standard Level 4 three-coat finish. The factor 0.053 means roughly 0.053 gallons per square foot of drywall surface.
Example: 584 sq ft × 0.053 = 31 gallons, or about six 5-gallon buckets plus one 1-gallon tub.
Another quick way to check your order: budget for one 5-gallon bucket of joint compound for every 10 sheets of drywall. For our 21-sheet example, that means roughly two buckets for hanging and bedding, plus two more for fill and finish coats — about four to five buckets total, which aligns with the 31-gallon calculation above.
If you are aiming for a Level 5 skim-coat finish (required for glossy paint or critical lighting), double the mud estimate. Level 5 applies a thin coat over the entire wall surface, not just the seams.
Step 6: Estimate Drywall Tape
Every place two drywall sheets meet needs tape to prevent cracks. Inside corners, outside corners, and around window returns all consume tape as well. The standard coverage rate:
Drywall Tape Estimate
This gives linear feet of tape needed. For 584 sq ft: 584 × 0.35 = 204 linear feet, or just over two standard 250-foot rolls (buy two to be safe).
Paper tape is the industry standard for flat seams and inside corners. It is stronger than mesh tape and less likely to bubble or crack over time. Fiberglass mesh tape works for flat seams and is self-adhesive, which makes it popular with DIYers, but most professionals avoid it on inside corners. For outside corners, use metal or vinyl corner bead instead of tape — it creates a crisp, durable edge.
Step 7: Do Not Forget Screws and Corner Bead
A complete drywall finishing materials list includes more than boards, mud, and tape. Building codes and manufacturer guidelines require screws spaced every 12 inches on walls and every 12 inches on ceilings (sometimes 8 inches on ceilings in fire-rated assemblies).
- Screws: Plan for about 1 screw per square foot of drywall, or roughly 32 to 35 screws per 4×8 sheet. For 584 sq ft, order about 600 screws (one 5-pound box of 1-1/4" coarse-thread drywall screws holds roughly 800 to 900 screws).
- Corner bead: Count every outside corner in the room. Standard 8-foot sticks of metal or paper-faced corner bead cover most wall heights. Buy one stick per outside corner plus one extra.
- Primer: Once the mud is sanded, raw drywall and compound absorb paint unevenly. Budget for one gallon of drywall primer per 300 to 400 sq ft. Our Paint Coverage Calculator can help you estimate primer and finish paint after the drywall work is done.
Step 8: Ceiling Drywall Requires Extra Care

Ceilings are the hardest part of any drywall job. Gravity works against you, screw spacing is tighter, and finishing overhead seams is slow and tiring. A dedicated drywall ceiling calculator approach uses the same area formula as walls, but keep these ceiling-specific rules in mind:
- Use 5/8-inch board on ceilings when joist spacing is 24 inches on center. The extra thickness prevents sagging over time. For 16-inch joist spacing, 1/2-inch board is acceptable on residential ceilings up to 8 feet.
- Run ceiling sheets perpendicular to the joists. Each sheet should span multiple joists for rigidity. Never run sheets parallel to a single joist.
- Add 5% extra waste for ceilings. Cutting around light fixtures, ceiling fans, and HVAC registers generates more scrap than wall cutouts.
- Rent a drywall lift for ceilings. A panel lift holds the sheet flush against the joists while you screw it in place. Trying to hold a 4×12 sheet overhead with a helper is dangerous and slow.
Complete Drywall Materials List: Worked Example
Here is a full shopping list for the 12×14-foot room with 8-foot ceilings (584 sq ft total) we have been using throughout this guide:
| Material | Quantity | Notes |
|---|---|---|
| 4' × 8' Drywall Sheets (1/2") | 21 sheets | Includes 10% waste factor |
| All-Purpose Joint Compound | 6 × 5-gal buckets | Level 4 finish; buy 7 if unsure |
| Paper Joint Tape (250 ft rolls) | 2 rolls | ~204 linear feet needed |
| Drywall Screws (1-1/4" coarse) | 1 × 5-lb box | ~600 screws needed |
| Metal Corner Bead (8 ft) | 4 sticks | One per outside corner |
| Drywall Primer | 2 gallons | Apply before finish paint |
For a quick per-100-square-foot reference, use this summary when estimating smaller patches or multiple rooms:
| Material | Per 100 sq ft |
|---|---|
| 4' × 8' Sheets (with waste) | 3.5 sheets |
| Joint Compound | ~5.3 gallons (1 bucket) |
| Joint Tape | ~35 linear feet |
| Drywall Screws | ~100 screws |
The Fastest Way: Use a Drywall Calculator
Manual math works for a single room, but most projects involve multiple rooms, different ceiling heights, and a mix of wall and ceiling surfaces. Doing every calculation by hand invites rounding errors and missed waste factors.
Our Drywall & Sheetrock Calculator acts as a full drywall calculator, drywall mud calculator, and drywall tape calculator in one tool. Enter your total square footage, pick your sheet size, and it returns:
- Exact sheet count with waste factor built in
- Gallons of joint compound for your chosen finish level
- Linear feet and roll count for tape
- Screw count based on standard spacing
Pair it with the Wall Square Footage Calculator to measure each room accurately before you plug numbers into the drywall tool. Once your walls are hung and finished, check our guide on How to Estimate Paint for Interior Walls to plan your primer and topcoat order. For budgeting the full project including labor, see The Cost of Drywall per Square Foot.
Final Thoughts
Accurate drywall estimation comes down to three habits: measure gross area (not net), add a real waste factor, and account for every finishing product — not just the boards. Joint compound and tape are cheap compared to a second trip to the store mid-project, so round up on mud and buy an extra roll of tape.
Ready to build your materials list? Head to our Drywall & Sheetrock Calculator and get your exact counts in seconds.
Frequently Asked Questions
How much joint compound do I need per sheet of drywall?
For a standard Level 4 finish, plan on roughly half a 5-gallon bucket (about 2.5 gallons) of all-purpose joint compound per 4×8 sheet. That covers bedding tape, filling screw heads, and two finish coats over every seam. Ceilings and Level 5 skim-coat projects use significantly more.
Should I use 4×8 or 4×12 drywall sheets?
Use 4×8 sheets for standard 8-foot ceilings and small rooms where you can carry boards alone. Choose 4×12 sheets for large open walls and ceilings over 9 feet tall. Longer sheets mean fewer seams to tape and mud, which saves finishing time even though each board is heavier and harder to handle without a lift.
How much drywall tape do I need for a 10×12 room?
A 10×12 room with 8-foot ceilings has about 352 sq ft of wall surface (not counting the ceiling). At 0.35 feet of tape per square foot, you need roughly 123 linear feet — one 250-foot roll is enough with plenty to spare. Add the ceiling (120 sq ft) and you are at about 165 linear feet, still within a single roll.
What waste factor should I use for drywall?
A 10% waste factor works for most rectangular rooms with a few standard doors and windows. Increase to 15% for rooms with many openings, angled walls, or vaulted ceilings. Never subtract door and window area from your total — the cutout scraps become filler pieces, and the waste factor covers the rest.
About the Author

Zain Sheikh — With over 10 years of hands‑on experience in residential and commercial construction, Zain ensures that every calculator on our platform accounts for real‑world variables, waste factors, and site conditions. Contact our team for technical inquiries.
Related Guides
The Cost of Drywall per Square Foot: 2026 Price Guide
Budgeting for a renovation? Learn exactly what it costs to hang, tape, and finish drywall in 2026, including labor, materials, and specialized board pricing.

How to Estimate Paint for Interior Walls
Learn how to accurately calculate the amount of paint you need for your interior walls. This guide covers measuring, surface area calculations, and using a paint calculator to save time and money.
Related Calculators
Drywall & Sheetrock Calculator
Estimate drywall sheets, joint compound, and tape needed for walls and ceilings.

Wall Square Footage
Calculate wall area excluding doors and windows.
Material Cost Calculator
Estimate total material costs based on unit pricing.